Showing posts with label sewing. Show all posts

Wednesday, 16 November 2011

the new artisans

from 'the new artisans'

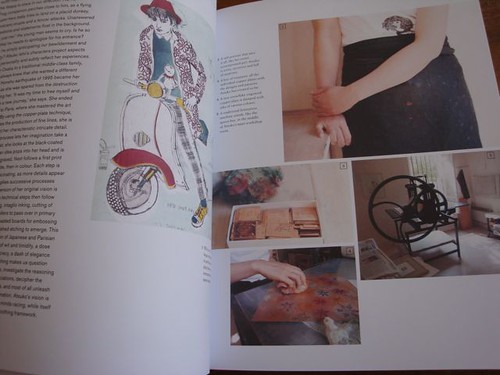
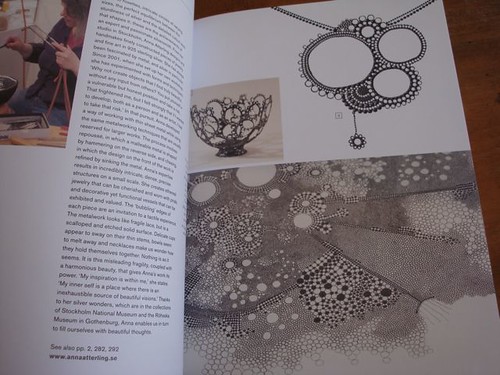
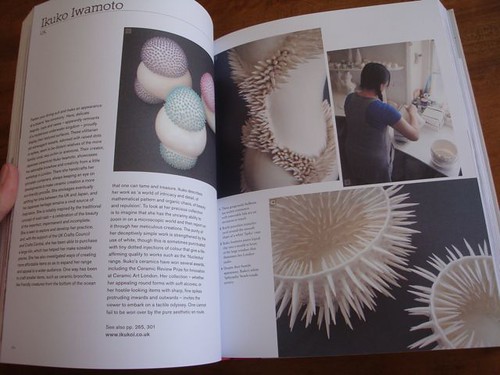
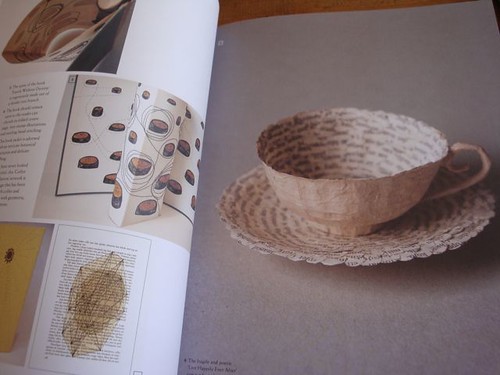
Inside The New Artisans by Olivier Dupon.

A really beautiful book showcasing the work of 75 artisans from across a number of different countries. I really like the way the author thinks it's time to reclaim the word 'artisan' and put it up in lights. Too true. There are very good reasons for having birthdays and this book is one of them (even though it's a tad early). Even better when one gets to specifically point out the gift.

I can't imagine this as an e-book, by the way. It just wouldn't do it justice. I think Louise Adler (from University of Melbourne Press) is right when she says that some books will always remain available in hard copy. I think this is one.

Monday, 31 October 2011

the small things

pajama pants
it's the small things

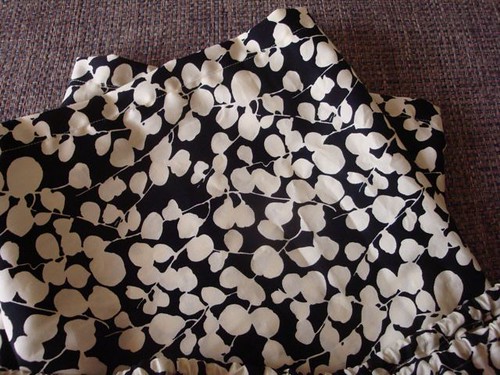
I'm not going to pretend that any of this sewing effort is fancy. It's not. I don't do fancy when it comes to sewing. But I can make a pair of pajama pants. Thanks to the Japanese pattern book, Sewing Talk, that is. Yes, I know, I've made these several times already so I really should break out, experiment a little and sew something different. I'm not likely too though as even remembering how to sew button holes nearly did my head in with this pair.

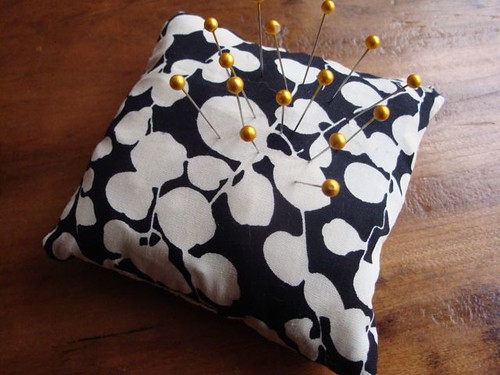
But hey, look at that pin cushion. It's the small things in life that can give you so much pleasure. Instead of dropping pins all over the floor each time I move this little number keeps them all in one spot. And I didn't even use a pattern. I know, genius! Just don't look too carefully at the button holes on those PJ pants, ok?

Sunday, 8 August 2010

in black

sewing, michiko kayaki, sewing talksewing talk, michiko kayaki, topsecond hand broochA black calico version of pattern b from Sewing Talk by Michiko Kayaki. This time I left the bottom edge of the top loose rather than using elastic. I think it might be good in warm weather that way. I've been meaning to make this for weeks. The third pic is a gorgeous little wooden hand painted brooch I bought at a junk stall in the Dandedong Ranges about a year ago. I like it against the rich blackness of the calico. Warning for those sewing with black calico for the first time: pre-wash with salt and vinegar before sewing because you might find, like I did, that a fair bit of colour will run out the first time you wash otherwise. Eventually it will stop and all will be good. Promise.

Monday, 22 March 2010

succulent flowers in red

red succulent flower, block printed fabric, handmadered, block printed fabric, succulent flower, handmadered succulent flower, block printed fabric, repeat patternSucculent flowers in red block printed by hand on cotton/linen blend fabric.

I had a lot of fun printing this piece. Unfortunately the light in these pics (especially that third one, what's going on there I wonder) makes the base fabric look slightly pink. Rest assured it's not. Instead it's a lovely natural shade. More like ivory. I have a piece printed with the succulent flowers in black ink that I'm tempted to sew into a skirt. I like the idea of using it in one panel at the front and perhaps the rest of the skirt in a dark light-weight denim. Sewers out there - is this idea a bit crazy?

Saturday, 12 December 2009

another sleepy cotton story

'More picture of pajamas?' I hear you say. Well yes, just one more post about the pj sewing frenzy and then that's it. Promise.

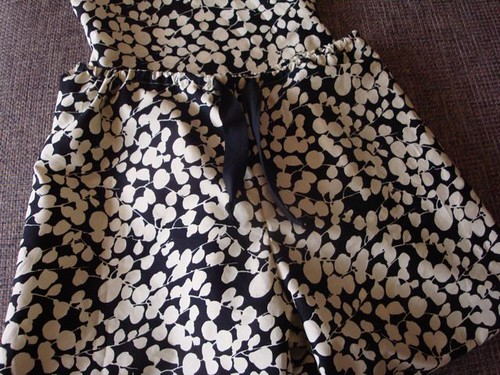
These were made from 100% cotton purchased from our friend Spotlight. It's a heavier weight cotton then the previous pair but still ok for summer. I found the fabric in that funny section they call 'American craft fabric'. Whatever that means. My challenge was that I wanted the leafy branches to go length ways down the legs but because of the fabric width I was forced to go the other way. So the branches in fact go sideways across the legs. Some would say a little less flattering. I think I've just gotten away with it. What do you think? Please excuse the green polka dot felted slippers. It was a bit chilly here this morning.

Sunday, 6 December 2009

finished: pj pants

Drum roll please.......the PJ pants are complete! Yay! Mind you it took about 10 goes on scraps to master button holes. It turned out I just had to tweak the setting on my machine to make them happen properly. Two button holes are needed in the waist for the bias tape to come through at the front. So no actual buttons. They're a comfy fit. Nice wide leg pants (though that's hard to see in the photo where I'm modelling them) and damn easy to sew if you already know how to do button holes. I will confess my one error: I accidentally sewed the front of the two legs together so it looked more like a skirt. This was because I was following the drawings in my Japanese pattern book and misunderstood where they were going. So 10 mins or so of unpicking commenced before I could remedy the situation. I had a good laugh about it though.For those of you who want the detail here's the book I used. Pattern Q. It calls for PJs with fancy leg edges on 3/4 pants but I just used ordinary fabric and made them longer. My fabric (surprisingly) was found in Spotlight. It's extremely light weight cotton and good for PJs I think.

Saturday, 5 December 2009

making and reading

I'm going to make some new pajama pants from this fabric over the weekend. With any luck I'll be using a simple pattern from my Japanese sewing book.

I've just finished reading a novel by Kim Edwards: The Memory Keeper's Daughter and I loved it! The kind of book you can't put down. The artwork on the cover fits the tale so well - so ephemerally fragile and beautiful.


What are you up to over the next couple of days? Any plans? Reading anything good at the moment?

Tuesday, 3 November 2009

project b

This time I've made a summer top based on the same pattern as the dress. It's project b in the book. Once you've made the dress (project c) the top's quite easy. It has elastic gathering in the neck and sleeves but also loosely at the waist. I decided to line the top with some very thin cotton lining and it feels great against my skin. The top pic, while it does make me look pregnant (I'm not), gives you a better idea of the fabric than any other photo I've taken. And the top pic is closer to the real colour than the 2nd one. In reality it's a lovely tea green. It's to-die-for I swear although it's hard to see that in these photos I know.

Sunday, 1 November 2009

little red dress

Four hours later and the dress from Sewing Talk is finished. Sorry about the funny reflection shot but I don't have a full length mirror and was the only one home when I took these photos. So that's me standing outside our bi-fold doors catching the reflection so that you can see the overall shape of the dress [and my cat's tail at the bottom]. I like the '60's feel of the silhouette.

Some detail around the neck and arms in this pic. The pattern was pretty straight forward but the trickiest bit was making the bias strips that line the neck and arm holes. I'd never done that before. The directions were pretty easy to follow in the pattern pictures even for a beginner like me. The red in these pics looks far brighter than it is unfortunately.

I'm not a big person so this pic shows you how loose the style is. If I was to make it again I wouldn't choose the largest size (I chose Japanese size 13 based on their body measurements with a waist of 70 cm) because it feels a bit too baggy on me.

I also read here that you should allow extra for seams on patterns from Japanese books but I forgot to and it worked out ok with this style. I did however add 5cm extra to the length because I'm 166cm tall and I know most Japanese women are around 160cm. Oh and something I didn't realise until I started is that you need to trace the pattern onto some other paper and then cut that out and attach it to your fabric. Because they try to economise on space they overlap patterns from different parts of the book so you can't cut them out directly as they are.

Thanks felt cafe for this link which has translations for some of the Japanese terms used in the patterns. I was able to read most of them but you really don't need to know how to read Japanese to sew with these books.

Saturday, 31 October 2009

the challenge


This is my sewing project for the weekend. I'm using a pattern from the Japanese sewing book Sewing Talk by Machiko Kayaki. I think I've found the perfect fabric for it too. This red seer-sucker Japanese patterned fabric (pic 2). It feels a bit like paper to touch and has so much texture to it. The problem is the fabric is so beautiful I'm quite fearful of cutting into it and making a start. I've never used a Japanese pattern book before so this will be interesting. Hopefully I'll be reporting back with pics of the finished frock in a few days. Fingers crossed.

Saturday, 10 October 2009

hanabi shirt in chocolate brown

I know it must seem like all I ever do lately is print hanabi in different ways on different fabrics. One of my work colleagues even suggested I could keep going and make a whole range of clothes with hanabi. But that would be kind of wacky. In my defense I will say that I printed this one a while ago when it was called particles but today I sewed it into this shirt.
I'm calling this one hanabi shirt in chocolate brown. Now for all you super nifty sewers out there I have to let you know something - I made this without a pattern! Yep, that's right, I free-wheeled it and just cut the fabric out around a shirt I've had for years and really like. It was definitely scary to do this. I kept thinking, oh man you are going to mess this up. And I will say it's not perfect. BUT it does have lining inside it! I've never put lining in anything before so that was kind of interesting. I bought this super soft light-weight natural coloured cotton lining because I wanted the shirt to feel really soft against my skin. It took ages for me to work out how to do it so that it looked as nice on the inside (well almost) as it does on the outside (I'm talking stitching here) but I got there eventually. And I made friends with my iron. I had no idea how useful an iron can be with sewing.
This pic is just to prove my story about the lining. Just in case you thought I was fibbing or something.

Sunday, 4 October 2009

hanabi print in grey

This time I printed hanabi in grey on a new black light-weight denim skirt I made yesterday. I decided to print the motif down the centre of the skirt and I think it works. I had a few issues with printing yesterday but I'm pretty sure I've sorted it out now. These things are all trial and error :)

I made the skirt a bit loose to allow for the 4% shrinkage when it's heat set. Fingers crossed it will fit more snuggly once that's done.

Saturday, 12 September 2009

all stitched up

This post is a bit of a show and tell because I've made my first skirt ever! And what's more surprising is I even like it :) It's made from very dark light-weight denim with a very simple pattern that falls just below the knee. But it does have a zip! This is a big deal as it took 5 goes on crappy fabric for me to get it right. I patiently unpicked the mistakes very time to re-use the zip until I finally understood how to do it properly. I listened to about 4 podcasts from craft sanity while I was sewing so I had good company. The skirt's not finished yet as I plan to screen print either hanabi or dragonflies on the front of it when I get around to repairing my silk screen after it spontaneously burst 2 nights ago. I think this top from Queen (swoon) looks perfect with it.

Edit a few hours later: I printed hanabi on the skirt (see 2nd pic). It took 3 layers of red to get it to stand out like that on the denim because it's so dark. I was saved by Jezze's innovative credit card method of screen printing.